Before you start to become too excited, we can’t migrate everything automatically into Swift 6 Concurrency code. However, there are upcoming Swift 6 features that are perfectly suitable for semi-automatic migration, and in this lesson, I’ll tell you how it works.
Note
Migration tooling got introduced in Swift 6.2 via proposal SE-486 Migration tooling for Swift features.
We’ve briefly discussed upcoming features throughout the course—these are features that are currently opt-in but will eventually become part of the core language. It’s important to migrate your projects to these features since you’ll have to eventually. Therefore, making use of migration tooling is helpful!
Running a migration in Xcode
I’ll first explain how migrations work in Xcode. In this example, we’re going to migrate the upcoming feature called SWIFT_UPCOMING_FEATURE_EXISTENTIAL_ANY, which is part of proposal SE-335 Introduce existential any. This is a Swift 6 feature where we’ll have to explicitly mark existentials using the any keyword.
Inside Xcode’s Build Settings you’ll find this feature named as “Require Existential any”. It’s probably set to No, but you can change it to either Yes or Migrate. The latter is what we’ll use:
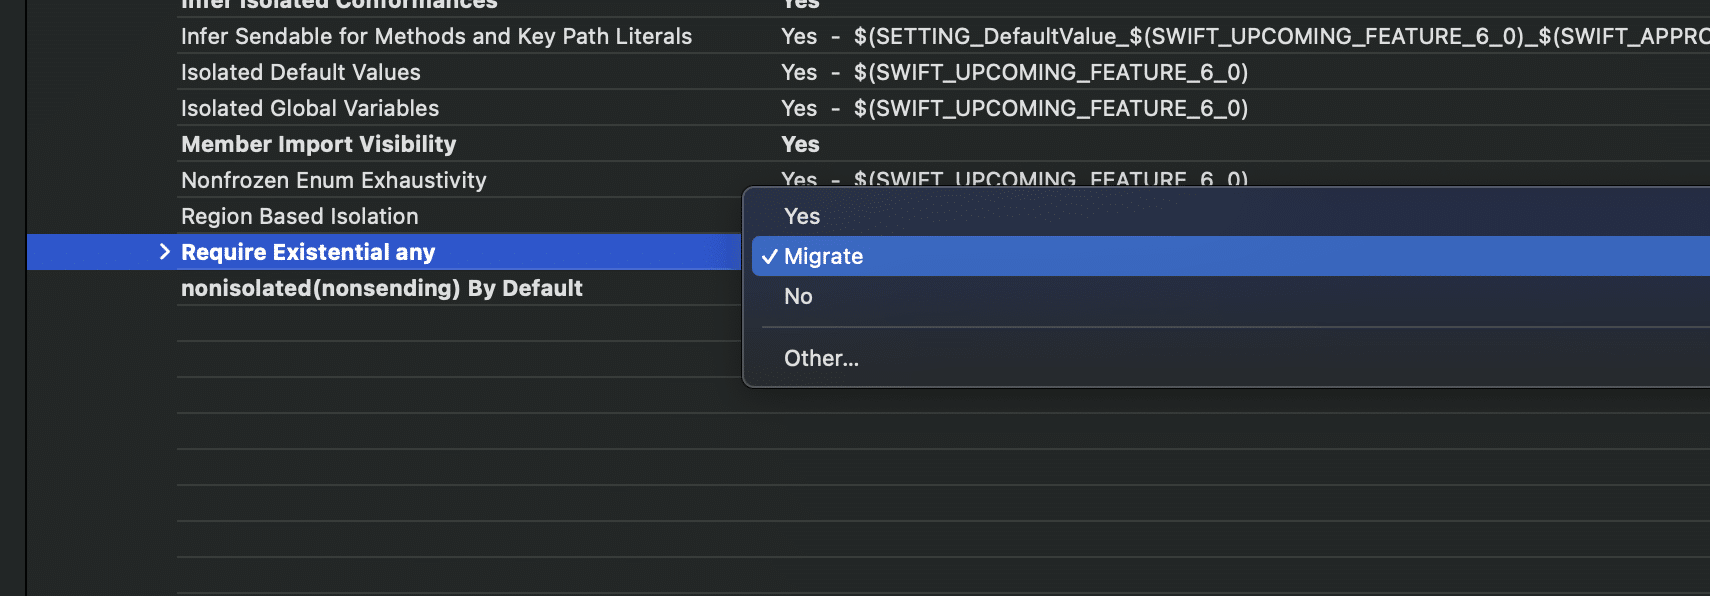
The Migrate value is a temporary setting used only during the migration process. Once configured, you can build your project, and new warnings will appear. In my example, I used the Diagnostics open-source example project. It triggered a few like these:

As you can see, the warnings mark the code that has to be migrated. You can use the Apply button to apply the fix automatically. There’s currently no way to automatically apply these fix it suggestions.
Running a migration for packages
Swift Packages work a little differently since we don’t have Xcode’s User Interface for build settings. Instead, we need to work with a terminal command:
% swift package migrate --help
OVERVIEW: Migrate a package or its individual targets to use the given set of features.

USAGE: swift package migrate [<options>] --to-feature <to-feature>
The terminal will print out much more information, but key for you is to know about the new migrate command.
In this lesson, we will migrate to the same upcoming feature as we did for the Xcode example: ExistentialAny. To do this, we need to run the following command if we want to migrate all package targets:
swift package migrate --to-feature ExistentialAny
Or, if we want to migrate a specific target only:
swift package migrate --target <target_name> --to-feature ExistentialAny
In my case, the Diagnostics package comes with two targets. One is the main package, while the other is a testing package. Therefore, I’m first focusing on the main package target:
swift package migrate --target "Diagnostics" --to-feature ExistentialAny
The difference with Xcode’s migration is that this command will actually apply the changes automatically. Output could look as follows:
[#ExistentialAny]: <https://docs.swift.org/compiler/documentation/diagnostics/existential-any>
/Users/avanderlee/Developer/GIT-Projects/Forks/Diagnostics/Sources/SmartInsights/UpdateAvailableInsight.swift:22:66: warning: use of protocol 'Error' as a type must be written 'any Error' [#ExistentialAny]
20 |         currentVersion: String = Bundle.appVersion,
21 |         itunesRegion: String = Locale.current.regionCode ?? "us",
22 |         appMetadataCompletion: (() -> Result<AppMetadataResults, Error>)? = nil
   |                                                                  `- warning: use of protocol 'Error' as a type must be written 'any Error' [#ExistentialAny]
23 |     ) {
24 |         guard let bundleIdentifier else { return nil }

[#ExistentialAny]: <https://docs.swift.org/compiler/documentation/diagnostics/existential-any>

Build of target: 'Diagnostics' complete! (28.93s)
> Applying fix-its
> Applied 24 fix-its in 11 files (0,016s)
> Updating manifest
The last three lines summarize the command and as you can see, 24 fix-its have been applied. No need to go over all warnings manually!
You’ll also notice a change in your Package.swift:
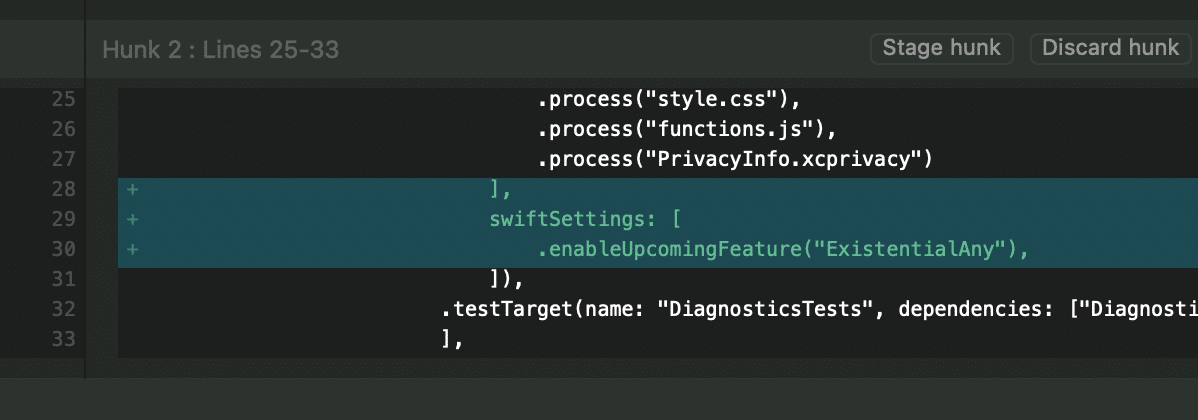
This change will only be applied if the migration succeeded without errors.
Summary
Swift’s migration tooling is excellent when you’re adopting upcoming Swift features. It won’t work for all features, but if possible, the Swift team will add migration support. In fact, all future proposals that intend to introduce an upcoming feature and provide for a mechanical migration should include a migration mode and detail its behavior alongside the migration paths in the Source compatibility section.
In the next lesson, we’re going to look into techniques to migrate closure-based code into concurrency replacements.